


REQUIRED SAFETY AND ESSENTIAL EQUIPMENT FOR MAKING SOAP
SAFETY EQUIPMENT FOR MAKING SOAP
Required safety and essential equipment for making soap first things first: Cold-process soapmaking requires working with lye, so it’s essential to take the correct safety precautions. Lye is a base, meaning it reacts to and neutralizes acids. And just like many household cleaners that are bases (like ammonia), if used properly, it shouldn’t be something to be afraid of.
The first tip I have is one of the most important: Mix outside, because when lye is poured into water, it produces fumes for a about a minute. Do not breathe the fumes!
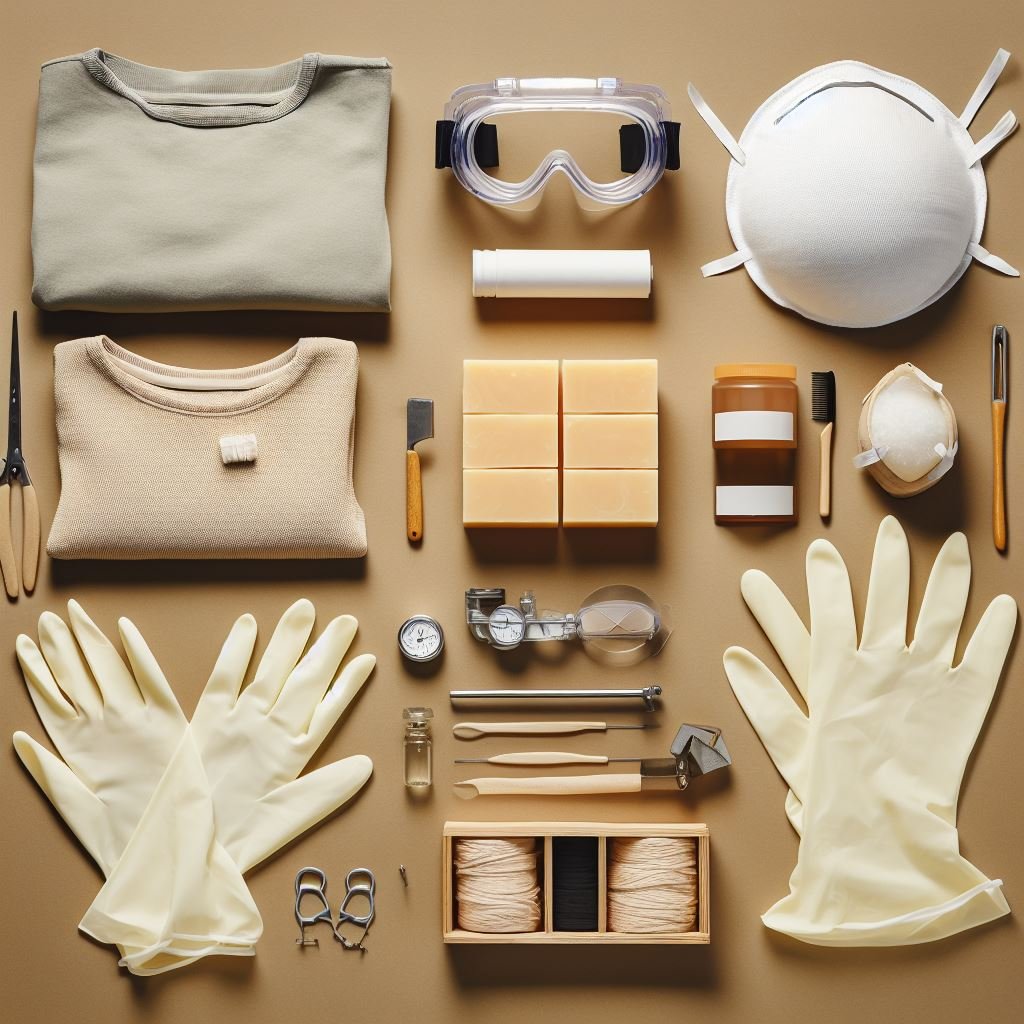
Here is a list of required safety equipment you’ll need when working with lye:
PROTECTIVE EYEWEAR:
Safety glasses ensure that your eyes will be protected from any accidental splashes that may occur when pouring or mixing. They can be purchased at hardware stores and craft shops for only a few dollars.
GLOVES:
Always wear gloves when soapmaking. Your hands are closest to the lye when pouring and mixing and should be protected. Any thin disposable gloves or thicker reusable gloves will work.
OLD CLOTHES THAT COVER EXPOSED SKIN:
In addition to your hands, be sure to cover all skin that could be injured, such as your forearms. Lye can bleach fabric, so an old, long-sleeved shirt should always be worn.
SAFETY MASK:
Hardware stores have a variety of safety masks that cover your mouth and can be reused. Many people wear a mask (and gloves) when cleaning their bathrooms, it’s not uncommon to have these items on hand.
ESSENTIAL EQUIPMENT FOR MAKING SOAP
A lot of the equipment you will need can be found around your kitchen. When we first started, the only thing we needed to purchase was a very large, cheap stainless steel pot. As you make more soap, you may want to purchase more items like special slicing tools, molds, or stampers. As you begin to make your own soap, it’s good to have your own items dedicated to soapmaking.
Large Stainless Steel Pot:
Lye reacts to metals like aluminum and iron, so you need to use stainless steel. Use a large enough pot that mixing will not cause it to splash out.
Hand Mixer or Stick Blender:
A hand mixer works great to emulsify the oils with the lye water, but a stick blender (also known as an immersion blender) will bring your soap to trace a lot faster and is easier to get down into the pot.
Large Stainless Steel Spoon:
Use a large stainless steel spoon to stir the fats and oils as they melt and to test whether the soap has come to trace.
Glass or Plastic Bowls:
we use both. we prefer to use a plastic bowl or storage container for lye water, because plastic cools a lot faster than glass. we use my regular large glass mixing bowls for weighing all the fats, oils, and waxes.
Kitchen Scale:
It’s important to have a good digital kitchen scale with a “tare” button that resets the weight to zero after you place a bowl on the scale and that measures ounces to at least tenths (one digit after the decimal point). This allows you to weigh items such as 2.5 ounces.
Rubber or Plastic Spatula:
A medium-size spatula is handy for scraping soap out of the pot and making swirls of color.
Thermometer:
A thermometer is necessary for making sure the oils and lye water are at the ideal temperatures for creating an emulsion and for the saponification process to occur. You can use a glass candy thermometer (found in supermarkets and craft stores), but I prefer a good digital thermometer.
Soap Mold:
Soap molds are sold by capacity in pounds or by how many individual bars of soap they will make. Purchase a mold that can hold 3 pounds (12 bars) of soap or find a sturdy box that can be converted into a soap mold.
Soap molds come in all shapes, sizes, and materials. Every soapmaker has a favorite. Here’s a description of the different types to help you find yours:
– LOAF MOLDS:
These are the most common type. They are long and rectangular, typically with an open top. A good strong loaf mold is made from wood, but many manufacturers make them out of silicone. Wooden loaf molds are my favorite because they are sturdy. I like the shape they give my soaps, and I have plastic dividers so that I don’t have to struggle to achieve uniform sizes and weights.
– LOG MOLDS:
These molds are rounded like the bottom of a log. You can find them shaped as large rectangles or individual cups. After your soap hardens, it will be rounded on one side and flat on the other.
– SILICON MOLDS:
Soft silicone molds are very convenient for making specialty shapes, such as flowers, leaves, or even cartoon characters. (Beware of hard plastic molds, as they can be very difficult to remove soap from without destroying the shape.) Silicone molds also don’t need any lining. we are not big on using plastics, but the temperatures stay so low that there is no danger in using them. However, they do take longer for the soap to cure before removing; instead of 24 hours, you often need to wait 48 to 72 hours because air is not in contact with the soap. You also have to slowly peel away the silicone from the soap.
– DIY MOLDS:
You can also make molds from items around your home. Just make sure that you don’t mind if it gets ruined by oils and that your soap can be removed easily. Glass does not work well. People say you can put it in the freezer and the soap will release, but I’ve tried this technique a few times and it has never worked. Instead, choose cardboard boxes or plastic that you can bend or tear. My friend likes to use round potato chip containers and modified cereal boxes.
There are instructions online for how to build molds of different sizes from wood or PVC pipe. Again, just make sure you have a clear plan for removing the soap, whether that means installing hinges or having sides that unscrew.
Parchment or Waxed Paper:
If you are not using a silicone soap mold, you will need to line make sure the soap doesn’t stick. Lining can easily be done with parchment or waxed paper. I used to tape the parchment paper in place before I learned the simple trick of turning the paper over so that it curls down instead of up. You don’t want your parchment paper moving when you’re pouring soap because it will make a mess, so if it’s not lying flat, go ahead and add a few strips of tape.
Sources / References
Natural Things Shop uses only high-quality sources to support the facts in our articles. Read our editorial process to learn more about how we fact-check our content and keep it accurate, trustworthy and reliable.
All the images we use on our site are produced with Dall-e 3 artificial intelligence technology. There are no legal problems regarding copyright.
Kelly Cable
- The Natural Soapmaking Book For Beginners
- DIY Soaps: Using All-Natural Herbs, Spices & Essential Oils